Posts

Showing posts with the label auto_desk_Maya

maya lesson 5- photogrammetry Part 3/4: Scene Modelling & Option 1 (Static Match) - Non-Compositing (Single Pass) Integration of Objects

Image
part 3 modeling was fairly straight forward after a couple of attempts and changing the lens focus   part 4 "option 1" was adding the additional shapes to the scene followed by adding & adjusting a shadow matte shader to the crate shape and background to get a full 3d picture.

maya lesson 4- photogrammetry Part 2: Camera & Scene Matching in 3D

Image
 

Maya lesson- 3 Curve driven squash & stretch

Image
this session follows the same fundamentals as we did for the mushroom the method of stretch and squash. The image below displayed in the node editor is the structure of what we have to do for this particular task, as maths wasn't one of my strong suits and this little bit difficult mathematical side when taking information the entirety of spine feeding it into its three separate joints that control how the character would be posed.  

Maya Lesson- 2 No Flip Pole Vector

Image
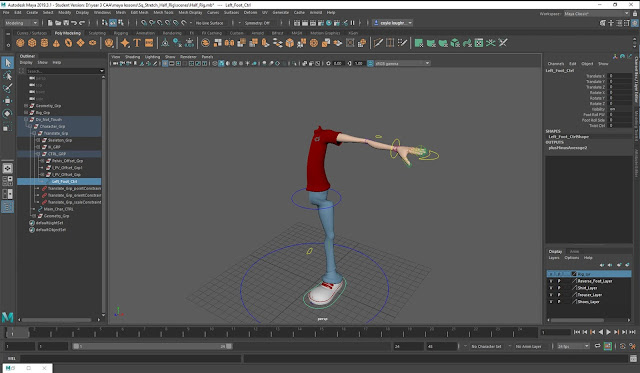
  this tutorial compared to the others is short and was easier to digest as we were adding a no flip pole vector to an existing model. going to the node editor I was able to understand how to generally setting it up, it was setting a twist attribute with the foot control that I was slightly confused with but looking over the tutorial given I was able to get past that.

Maya lesson- basic squash & streach mushroom

Image
in this my lesson we went over the basics needed to squash and stretch a model in Maya. first of all we had to use located tools to get a distance measurement on the length of the initial spine in this mushroom, the locators are placed on the top and the bottom rings to keep it the same size as I adjust the nodes and once done those rigs will assists in stretching and squishing the model "squished" "stretched" k "nodes" with the node it required a fair knowledge of mathematics which wasn't too hard to decipher but the initial construction and layout of the nodes displayed for you was a fair bit of a challenge as this was deemed the newer and easier way to let model's question stretch without problem but personally, I had ask a fair bit of help to fully wrap my head around of the nodes. the way the mathematics worked for each of the joints is that it was divided into three sections before reaching the joints dividing square routing and multiply, as ...

3d/acting task

Image

Auto desk maya: lip syncing and body movement.

Image

premise- road rough construction

Image
after having a tutorial with the tutor I set on the plan to not only construct the rough street idea of how I would like the final outcome to be mapped but also how I wish it to be when it was going through the street at the house towards the attic room and to said rings that are mentioned in the story. The house itself is practically a rough draft of where I want to go with it everything down to the minute detail is just rough, but now with this particular my file and layout of the street and items I can go about accordingly planning out my next moves for putting additional meat on the bone for this project with things like mirrors and paintings and gas lamps just to add a little bit more flavor to the batch. "without lamps" "with lamps" from these rendered images of the main street with and with out lamps, I've got a lot more of a solidified idea of how I would like to proceed with the next stages of content to produce before the final ...

premise- rough house design/ layout

Image
for what I want to do with the house design I had to roughly construct an idea in my of what I wanted to do for layout-wise. in terms of the innards of the house I thought myself I want to make it a simplified house I don't want to overcomplicate the amount of work that I would need to put into it, so roughly I decided where each of the rooms were gonna be followed by the main room which would be the attic. Answering another question I won't have as many items for things like the bedroom or bathroom on display when the animation comes around as ill be mostly focused around areas like the attic so to not overcomplicate designing items I decided to stick with stuff you would see in Victorian/Edwardian 1900s house when you're going upstairs all the way to the attic. the overview that you can see here is merely a rough idea of how I want the layout for each floor to look like making it would be an entirely different ball game but now I have some fo...

jet pack-jones full body

Image
in the image below we can see the full body of jetpack Jones finally constructed while I still need to do things like the UV and minor details to the look can safely say that we now have a full body of the model. but it may not be clear in this image that with the face modelled after importing it into the file with the body the face became somewhat distorted as it looked a lot less than face that I originally constructed any other file but I imagine for a bit of tinkering I should be able to fix the problem.

Maya tutorial weightlifting

Image

maya jetpack jones head part 1

Image
Maya jet-pack Jones head part 1 this is what i have done so far for the jet-pack Jones project, admitally starting was slightly difficult at the head as constructing it was met with leading to a problem that i could solve leading to the reconstruction of the head to a point that i felt happy with it. I'm now currently happy with what i have and i feel that i can make the deadline of constructing it by Christmas.

toolkit 2 - dramatic pose

Image
Dramatic poses 1st 2nd 3rd 4th 5th

toolkit 2-action pose

Image
Tool kit 2- action pose in this lesson we are were given the a ready made character "moom" to use and we were asked to select 5 real action poses from the internet and imitate them with "moom" to the bests we can. we use the emoji ranging between happy and dead to describe the level of destosion of the model. #1 the first pose i decided to go for something simple so i can get a feel for the model that i was using, so looking at the outcome for the pose there were no problem with the model distorting.  #2 even for this pose is facing forward compared to the reference image , after close inspection of the maya model there were bit that looked distorted around the left leg and the arms. #3 again this pose has distorted parts due to the choice of the pose which i was being a  little more daring with . #4 this one is came out worse then i tried to bend the spi...

tool kit 1; autodesk Maya

reflective statement: in the first year of this course for the Maya lessons, has been a bit of a struggle as this was almost complete new territory for me and learn bit by bit on the go. the course help to build skills manage my workload or switching between projects that I was working on around the same time.  I always found it easier to do 2d animation then 3d. during the time on the course, I learn not to leave unfinished projects on USB which I found out the hard way. "what if metropolis" and "fantastic voyage" were the major Maya animation files that weren't entirely directed with help from tutors, which did lead me to stumble on certain aspects in the final outcome for both projects "the rendering was a nightmare".  over the course of the summer break, I plan to improve on what I learned and make a fully functional model of my own design with the knowledge I got from this first-year messing about with the UVs and so forth. links to the work:...

autodesk- scooter

Image

autodesk block motion and text

Image

autodesk-toadstool

Image

autodesk_chain and motion

Image

autodesk-rocket

Image